

Short answer
- Calibrate the zero on the gauge's own disc when you start and every time you change transducer.
- For the best accuracy, or if the material isn't steel, do a one- or two-point calibration on samples of known thickness of the same material.
- Check the calibration on a reference block before you start, and calibrate at the part's temperature.
Problem 1: changing transducer and carrying on measuring
The symptom: after changing transducer, every reading is offset by a few tenths.
Why it happens: each transducer takes a different time to emit and receive (the delay). If the gauge keeps the previous transducer's delay, that error is added to every reading.
How it is solved: with the zero calibration. On QS gauges it is automatic: just rest the transducer, with couplant, on the calibration disc on the front of the gauge. When it finishes, the gauge is ready to measure steel.

Problem 2: the material isn't steel, or more accuracy is needed
The symptom: the zero is fine, but readings on your material don't match a known thickness.
Why it happens: the disc calibrates the delay, but final accuracy depends on the material velocity and on the transducer itself in that range.
How it is solved: with a one- or two-point calibration, on samples of known thickness of the same material:
- Enable the two-point calibration mode in the menu and measure the disc first.
- Measure the first sample and adjust the value on screen to its real thickness.
- For two points, measure the second sample, which must be thicker than the first, and adjust it the same way.
For the calibration to hold across the range, choose one sample near the thinnest thickness you will measure and another near the thickest. The gauge uses the velocity it is set to: set it first (see the ultrasonic velocity guide).
Problem 3: not knowing whether the calibration is good
How it is solved: by measuring a reference of known thickness before you start.
- The gauge's disc: to measure it without recalibrating, touch the edge of the disc until the indicator appears on screen and, without letting go, rest the transducer on it.
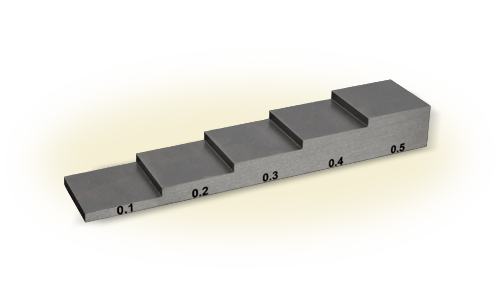
- A step block: several thicknesses in one piece, to check the calibration across the range and detect the "doubling" effect (readings of twice the real thickness below the transducer's minimum).
Problem 4: calibrating under some conditions and measuring under others
- Temperature: temperature changes the sound velocity and the transducer delay. Calibrate where you measure, with the samples at the part's temperature.
- Couplant and pressure: calibrate and measure with the same amount of gel and the same pressure (see the couplant gel guide).
- Echo-echo: in the QS5 DLE mode for painted parts, zero calibration isn't needed and is locked, because the delay doesn't affect the measurement.
Source: DEMEQ, QS5 user manual (zero calibration, one- and two-point calibration and measuring tips).